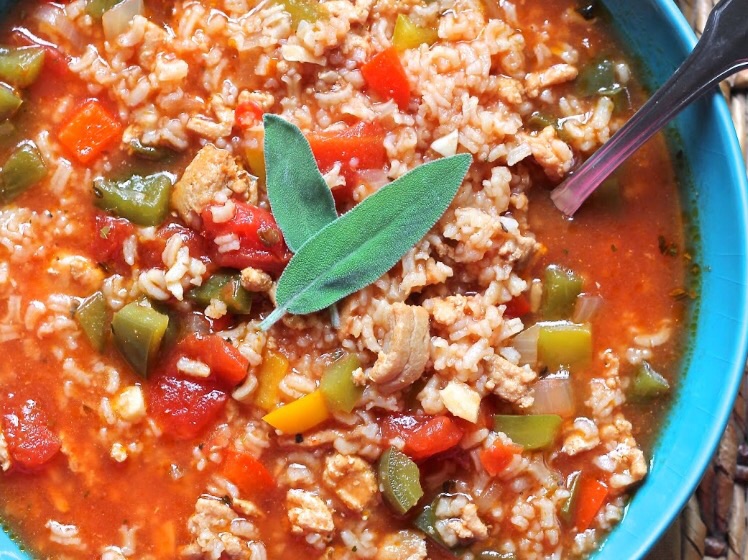
 Stuffed Pepper Soup by ValSoCal.blogspot.com 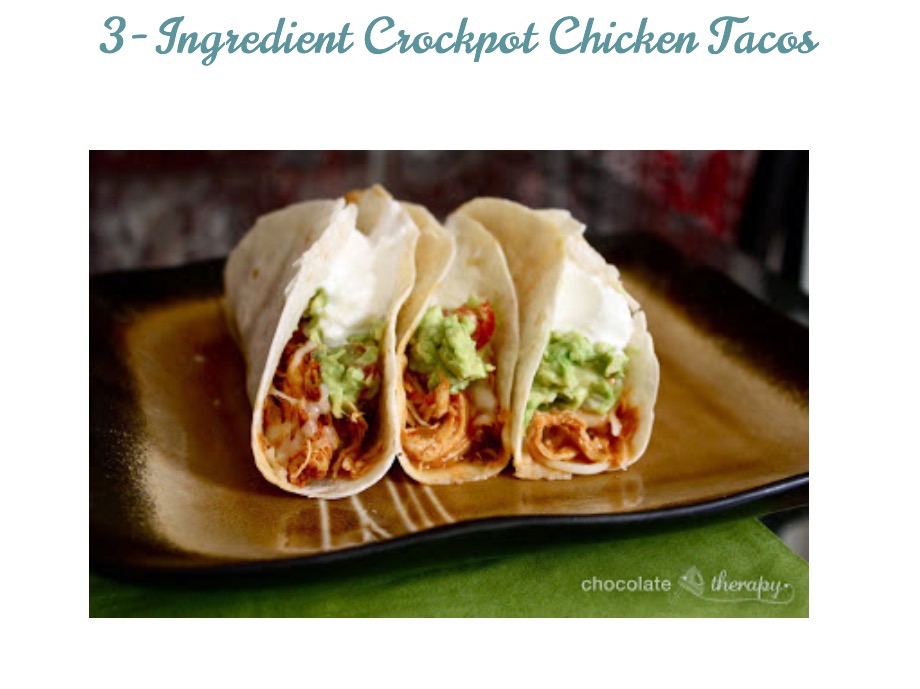 3 Ingedient Chicken Tacos by mychocolatetherapy.blogspot.com 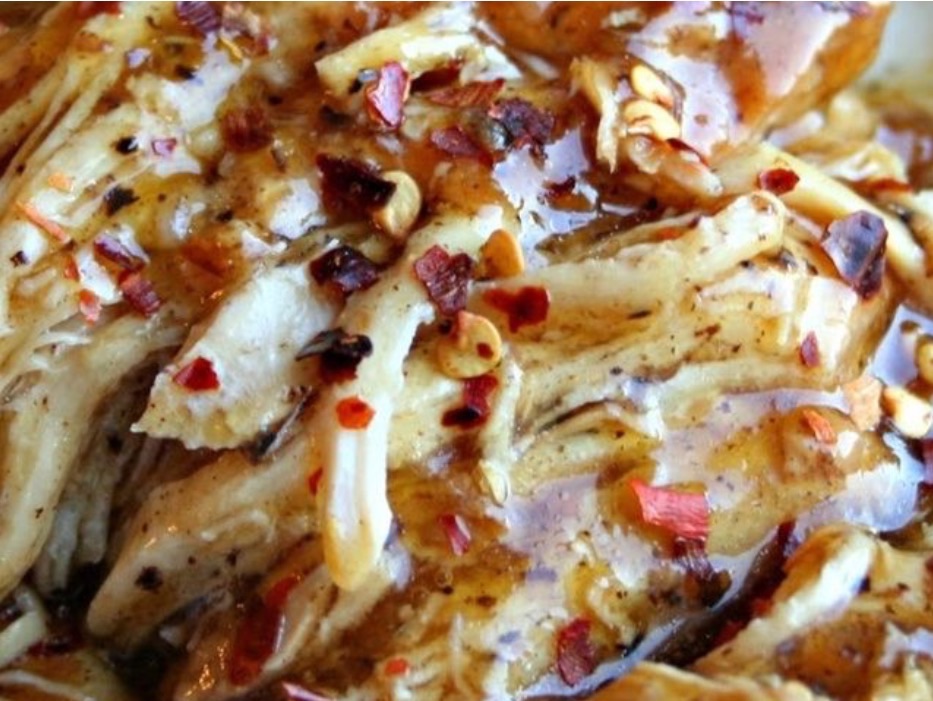 Sweet Garlic Chicken by thehighheeledhostess.com | I love to try new things and share them with people, so these great slow cooker recipes are no exception! They meet my criteria for healthy, quick, family friendly meals and each one was delicious! My crock pot is my secret weapon in the kitchen so of course I super love them too because they are so easy to make. I found each recipe on Pinterest and included the link and photo from that particular person. Stuffed Peppers. Yes we all love them in our house but I just don't always have the time to put them all together....enter the super yummy, super easy "Stuffed Pepper Soup" recipe from 'ValSoCal.blogspot.com' In her recipe she combines all the great things we love in our traditional stuffed peppers but in a soup version and I must say the results are pretty awesome! Her original recipe was not actually a slow cooker recipe but I easily converted it for myself. I added the ground turkey to the crock pot when it was frozen (whoops forgot to defrost it the night before) and just cooked it on high instead of low and it still came out fine. The nice thing is that you can make this either way you like, if you're not using a slow cooker the recipe says this can be made in about 20 minutes or so :) STUFFED PEPPER SOUP http://valsocal.blogspot.com/2014/01/stuffed-pepper-soup.html 4 Peppers-1 green, 1 red, 1 yellow, 1 orange (diced)...can also just use green if that suits you as well 1small onion diced 3 garlic cloves minced or 2-3 tsp 6 1/2 cups beef broth/stock (52 oz) - can be homemade or store bought 1 15 oz can tomatoe sauce 2 15 oz cans diced tomatoes 1 1/2 lbs ground turkey, chicken, or beef 3 tsp worcestershire sauce 1/2 tsp oregano 1/2 tsp basil 1/2 tsp dill (my own little addition) 1 1/2 cups instant white or brown rice Parmesan cheese Combine all ingredients in crock pot EXCEPT the instant rice. Cook on low (if the meat is defrosted) for approx 4 hours or cook on high (if the meat is frozen) for approx 6-8 hours Cook the rice in a separate pot according to directions on box, combine with soup in slow cooker, stir. Sprinkle with the Parmesan cheese and serve The second recipe that the fam really liked is for chicken tacos. This comes from 'mychocolatetherapy.blogspot.com' I've tried making these before and they never came out that good then I found this recipe and thought "DUH! What a good idea!" What I love the most...3 ingredients! Talk about easy AND budget friendly. 3 INGREDIENT CHICKEN TACOS http://www.mychocolatetherapy.com/2012/01/crockpot-chicken-tacos.html 6 chicken breasts (I used 8-10 chicken thighs because that's what I had on hand) 1 1oz envelope Taco Seasoning (or your own homemade taco seasoning) 1 16 oz jar Salsa (or your own homemade Salsa) Combine all ingredients in the crock pot and gently stir to coat chicken and mix. Cook on high for 4-6 hours or low for 6-8 hours. Chicken will easily shred apart when it's done. I made a quick batch of cornbread which you can find the recipe for on the recipe page under 'Fluffy Cake Like Cornbread' and served them with soft taco bowls, (which were much loved by everyone because they were so easy to use), shredded lettuce, cheese and sour cream. The third and final recipe treasure I love is for 'Sweet Garlic Chicken' by 'thehighheeledhostess.com' This recipe reminded me a little of my favorite chinese food, which is always a big hit in our house, but without all the oils and salts. SWEET GARLIC CHICKEN http://www.thehighheeledhostess.com/?m=1 4-6 chicken breasts (I used 2 small pkgs of thighs) 1 cup packed brown sugar 2/3 cup vinegar or Apple cider vinegar 1/4 cup lemon lime soda 2-3 TBSP minced garlic 2 TBSP soy sauce (I used low sodium soy sauce) 1 tsp fresh ground pepper 2 TBSP cornstarch 2 TBSP water Spray slow cooker with nonstick cooking spray or use a liner made for slow cookers, place chicken in bottom In a separate bowl mix together brown sugar, vinegar, soda, garlic, soy sauce, and pepper. Pour over chicken Cook on low 6-8 hours or on high for approx 4-6 hours Remove chicken from slow cooker, set aside. Pour or spoon remaining sauce into a saucepan Mix together the cornstarch and water in a small bowl or mixing cup, pour into saucepan and mix well. Let sauce come to a boil and boil for 2-3 minutes or until it starts to thicken and turns into a glaze. Remove from heat, let sit a minute or two, it will thicken as it cools. I served this on top of white rice with the glaze. All of these recipes can be found on my recipe page with the corresponding photo and link to the original recipe and creator. |
|
2 Comments
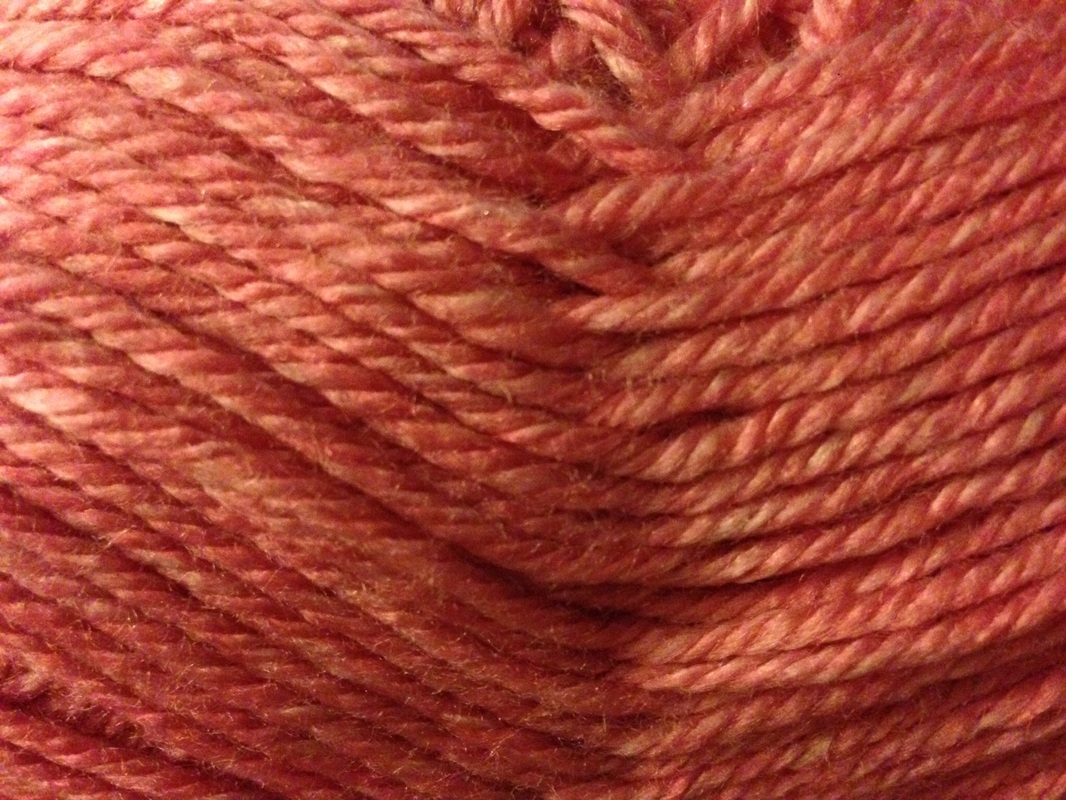
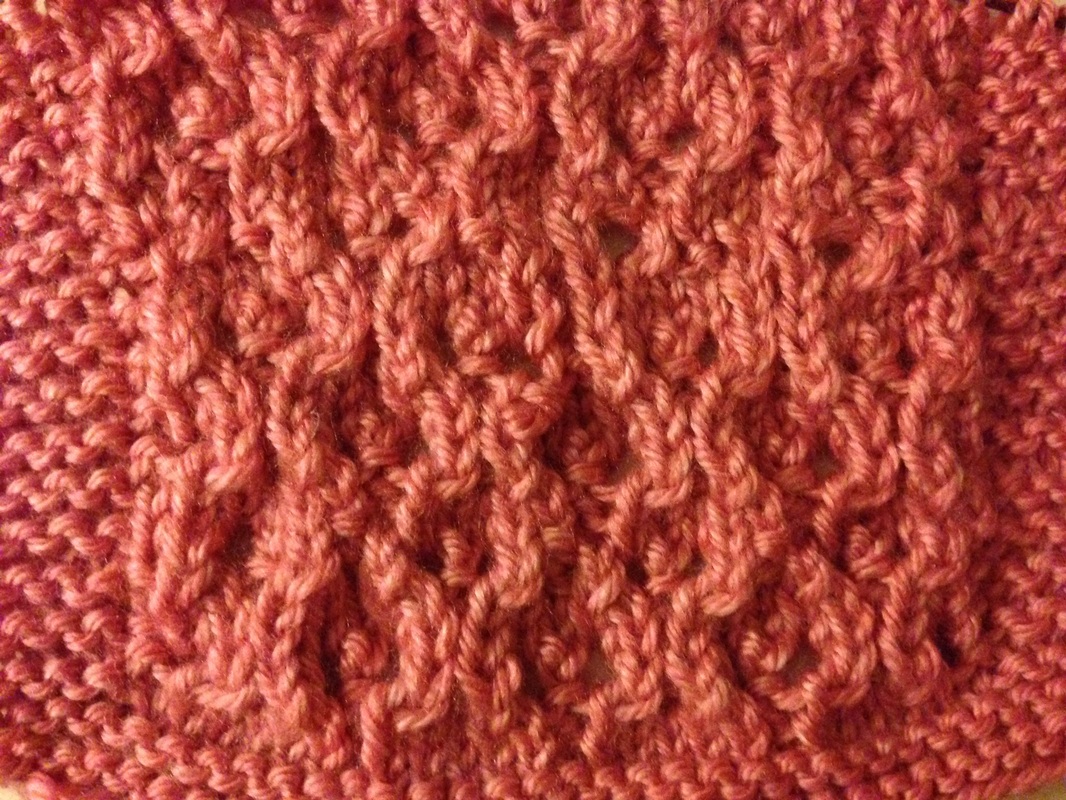
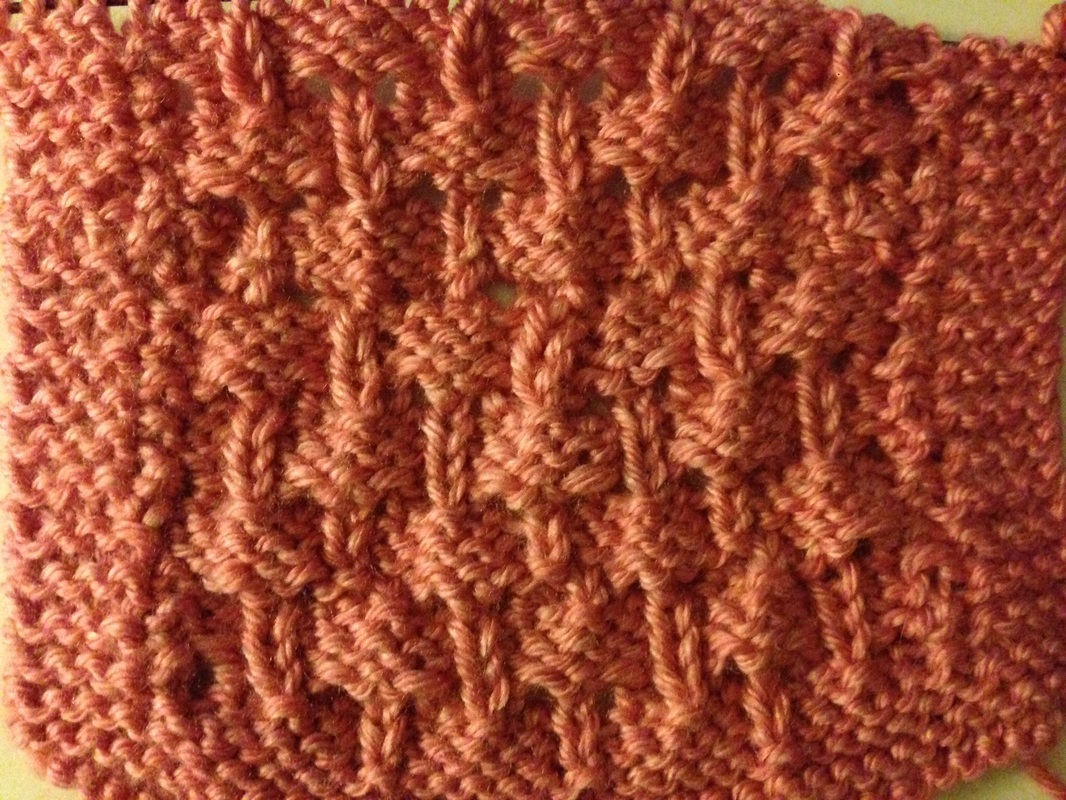
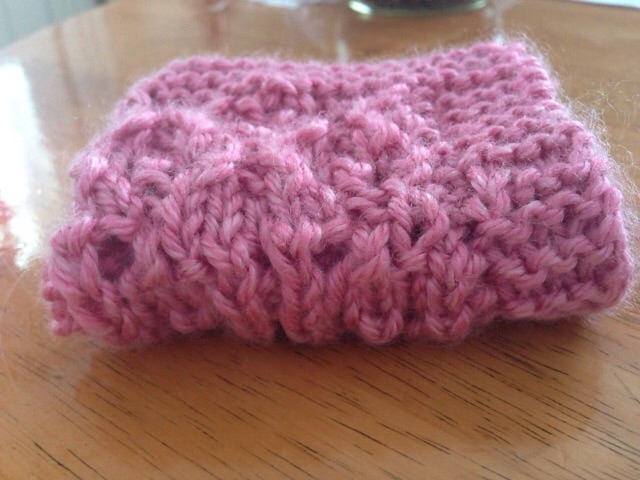
If you think lace knitting is too difficult or intimidating you really need to try this pattern! This pattern was born out of a need to find the perfect pattern for my little sweet pea niece. I searched and searched. I cast on and ripped out. I kept searching but I just couldn't find something...ya know...perfect! It had to mean something special, something that she would love forever and maybe even pass down to her daughter or granddaughter. Something special between just the two of us that we could always share together. There are tons of amazing and beautiful patterns out there but nothing seemed to fit... Then one night there I was puzzling away searching yet again when inspiration smacked me in the back of the head as if saying "Duh! Look right in front of your face woman!" And there it was, one of my favorite baby elephant statues on my end table! I love elephants. And that right there is an extreme understatement! They are my absolute favorite animals, I just love everything about them. So I took out my stitch dictionary and began building the perfect blanket, when I was done the true test was casting on and swatching it out to see how it would look. I was really happy with the result, it's beautiful on both the Right side and the Wrong side so It could be considered reversible if you like. It's made with a stitch called "Baby Elephants". It knits up quick and is easily memorized over an 8 row repeat. You will knit, purl, YO, p2tog, and ssp. The result is a soft squishy warm blanket for your little dear one. I've included the pattern for both the swatch I knit up and the blanket itself. The swatch is actually washcloth size so if you use a cotton yarn to match or accent the color you choose for the blanket you can make and give it as a set. You can even just use the swatch as a washcloth pattern for yourself or someone else too. Please keep in mind I have only test knit the swatch and not the blanket itself so if you come across any problems or questions please let me know and I'll be happy to help! FOR YOU DEAR ONE- THE ELENA WASHCLOTH Abbreviations/Stitch Explanation: co - cast on bo - bind off k - knit p - purl rep - repeat ndl - needle sts - stitches wyif - with yarn in front wyib - with yarn in back yo - yarn over -( in this pattern the yo's are done on the purl side) the yarn is taken over (counter clockwise) the top of the right hand needle and then under the needle to the front, where it is in the position to purl the next stitch p2tog - purl 2 stitches together ssp - slip slip purl - slip two stitches to the right hand needle purl wise.. Purl those two stitches together. A type of decrease usually done on the purl side (WS, wrong side) Materials: one skein Lionbrand "Heartland" yarn in color 'Denali' size 8 or 9 needles one large eye blunt needle for weaving in ends Instructions: co 33 sts knit 4 rows (WS) row 1 - k4 p1 *p5 k1, rep from * to last 10 sts, p6 k4 (RS) row 2 - k4 p1 *k5 p1, rep from * to last 4 sts, k4 (WS) row 3 - k4 *p1 yo p2tog k1, wyif ssp yo, rep from * to last 5 sts, p1 k4 (RS) row 4 - k4 p1 k2 *p1 k5, rep from * to last 8 sts, p1 k2 p1 k4 (WS) row 5 - k4 p3 k1 *p5 k1, rep from * to last 7 sts, p3 k4 (RS) row 6 - k4 p1 k2 *p1 k5, rep from * to last 8 sts, p1 k2 p1 k4 (WS) row 7 - k4 p1 *p2tog yo p1 yo ssp k1, rep from * to last 10 sts, p2tog yo p1 yo ssp p1 k4 (RS) row 8 - k4 p1 *k5 p1, rep from * to last 4 sts, k4 Repeat these 8 rows a total of four times. Knit 4 rows Bind off and weave in ends FOR YOU DEAR ONE - THE ELENA BLANKET Abbreviations/Stitch Explanation: co - cast on bo - bind off k - knit p - purl rep - repeat ndl - needle sts - stitches wyif - with yarn in front wyib - with yarn in back yo - yarn over -( in this pattern the yo's are done on the purl side) the yarn is taken over (counter clockwise) the top of the right hand needle and then under the needle to the front, where it is in the position to purl the next stitch p2tog - purl 2 stitches together ssp - slip slip purl - slip two stitches to the right hand needle purl wise.. Purl those two stitches together. A type of decrease usually done on the purl side (WS, wrong side) Materials: 4-5 skeins of Lionbrand "Heartland" yarn in color 'Denali' size 8 or 9 needles one large eye blunt needle for weaving in ends Instructions: co 173 sts knit 8 rows (WS) Row 1 - k8 p1 *p5 k1, rep from * to last 14 sts, p6 k8 (RS) Row 2 - k8 p1 *k5 p1, rep from * to last 8 sts, k8 (WS) Row 3 - k8 * p1 yo p2tog k1, wyif ssp, yo, rep from * to last 9 sts , p1 k8 (RS) Row 4 - k8 p1 k2 *p1 k5, rep from * to last 12 sts, p1 k2 p1 k8 (WS) Row 5 - k8 p3 k1 *p5 k1, rep from * to last 11 sts, p3 k8 (RS) Row 6 - k8 p1 k2 *p1 k5, rep from * to last 12 sts, p1 k2 p1 k8 (WS) Row 7 - k8 p1 *p2tog yo p1 yo ssp k1, rep from * to last 14 sts, p2tog yo p1 yo ssp p1 k8 (RS) Row 8 - k8 p1 *k5 p1, rep from * to last 8 sts, k8 Work this set of 8 rows until blanket reaches desired length (I went with four feet so my dear one won't grow out of it too soon) Knit 8 rows bo and weave in ends 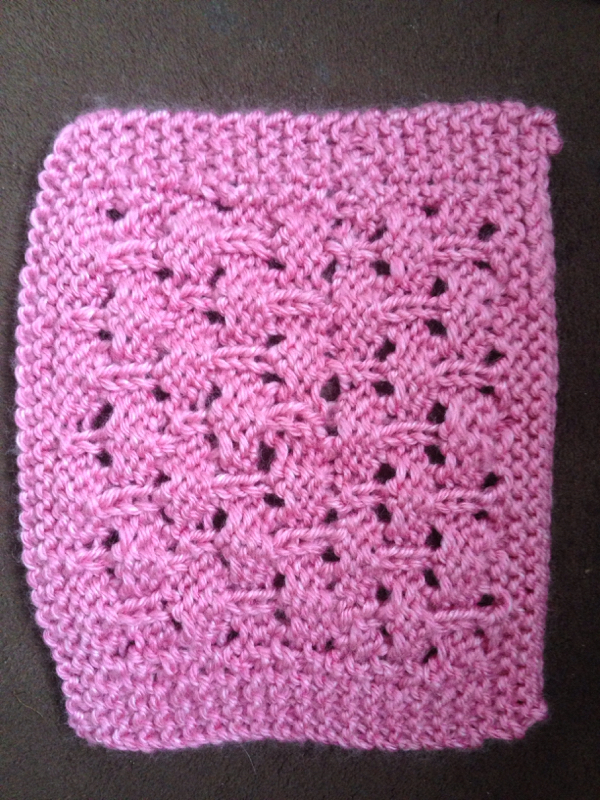 The Elena Washcloth (Wrong Side)  The Elena Washcloth Hello out there everyone! Sorry it's been a bit since my last post but life has been a bit crazy!
Today I want to share a great recipe for homemade pizza dough! I love to use this recipe for lots of things like my homemade stromboli, pizza, and garlic knots. So can you guess what's for dinner tonight? Pasta and garlic knots! I found this great dough recipe a while back from "Grandma Bee's Recipes" on Pinterest and I love it! The dough whips up in no time at all and if you have a stand mixer it's even faster. I've even made this ahead of time and frozen it and it comes out great too. Quick, easy, family friendly. Yup this totally fits the criteria! PIZZERIA PIZZA DOUGH Ingredients: 2 1/2 tsp active dry yeast (or one pkg) 1 cup warm (not hot) water 1 tsp sugar 1 tsp salt 2 1/2 cups flour Directions: Pour the warm water into a medium sized bowl, if using a stand mixer you can pour it right into the mixing bowl Sprinkle the yeast onto the water and allow to stand until it is dissolved and bubbles start to form, it will look a little foamy, approx 15 minutes Add the sugar and salt. Stir in one cup of the flour & stir until smooth. If using a stand mixer add one cup of flour and mix on low with the dough hook until smooth scraping sides of bowl as needed. Gradually add in the remaining flour and mix until dough is smooth but not too sticky to handle. (Dust your hands with flour to handle the dough and it won't stick to much) If using a stand mixer just add enough flour until the dough cleans the side of the bowl. Then let it mix for six minutes on medium speed. Knead dough by hand for five minutes on a floured surface if NOT using a stand mixer. Place dough in a large bowl that's been brushed with olive oil, cover with a damp kitchen towel and allow to rise for about an hour. Divide the dough in half for 2 medium pizzas or stromboli, into 1/4's for mini pizzas (we do that for our 'make your own pizza night'), or roll out into long strips and shape for garlic knots! For garlic knots we roll out long strips of dough, shape it into a knot or just leave as bread sticks, brush with butter or olive oil, sprinkle with Parmesan cheese, parsley, and some fresh garlic, bake about 15-20 minutes or until golden brown and serve with your favorite sauce. I use my homemade Red Wine and Roasted Red Pepper Sauce. You can also find the link to this recipe under the Recipe tab at the top of the page. 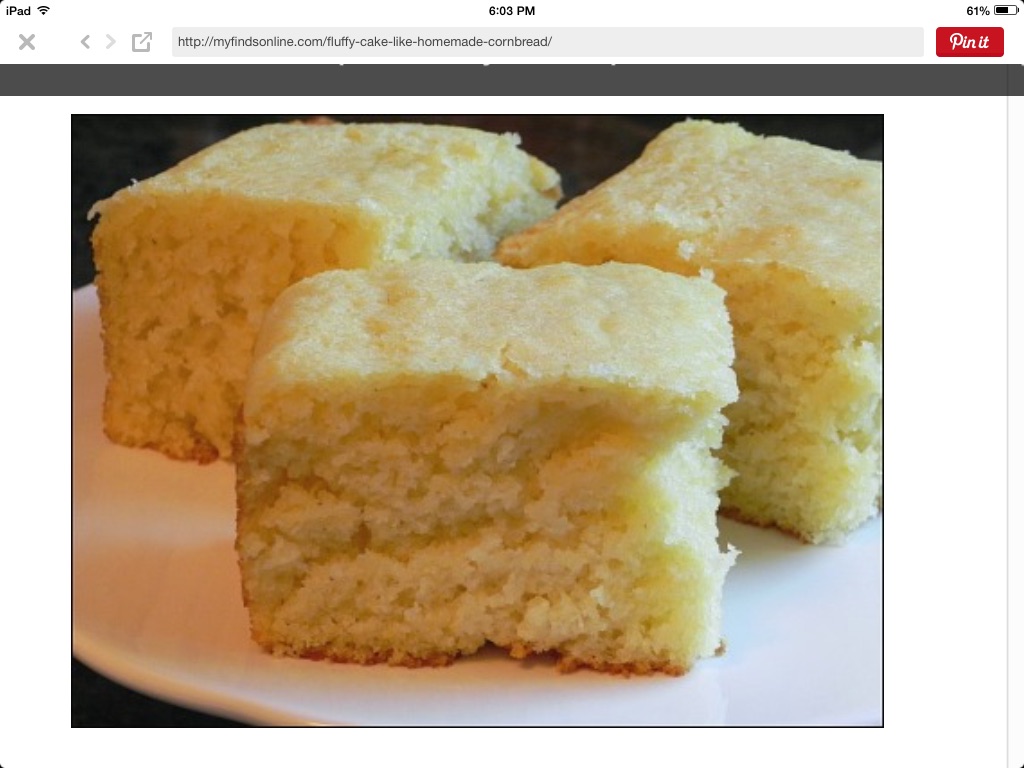 Hello friends! Today I wanted to share a great recipe i came across for homemade cornbread. I found this recipe on Pinterest at http://myfindsonline.com/fluffy-cake-like-homemade-cornbread/
You can click on the photo above to access the recipe or you can copy and paste the link (written out above) to your browser. I also kept the link visible in the photo above just in case that helps too. Our five year old is a picky eater. Wait, that's an understatement! There are only about 4 foods he will actually eat and cornbread is one of them. When I first made this recipe he ate the entire pan in about 8 hours. He had it for breakfast, lunch, snack, and dinner which is saying a lot given the fact that he usually never really eats the same food item more than once a day. I know, yikes! Lol I've made cornbread for all of us before but it was always so crumbly (which I don't really mind) but once it fell apart our five year old refused to eat it. This recipe is a bit more hearty so it stays together better, but it's also light and fluffy. So saying that I love this recipe is also yet another understatement! This has become my new go to recipe and it is already being requested on a regular basis, I see many more fresh loaves of cornbread in my future ;) FLUFFY CAKE-LIKE CORNBREAD Ingredients 1/2 cup yellow cornmeal 1 1/2 cup flour 2/3 cup sugar 1 TBSP baking powder 1/2 tsp salt 1/3 cup vegatable oil 3 TBSP unsalted butter, melted (ok I confess...I used 4-5) 2 eggs 1 1/4 cups milk Directions 1. Preheat oven to 350 degrees 2. Combine all ingredients in a medium to large mixing bowl and mix until just blended 3. Pour into an 8x8 baking pan lined with parchment paper or non-stick cooking spray and bake for 30-40 minutes or until it starts to lightly brown on top and edges ***I added in about an extra 1/4 cup of cornmeal just because, you can also pour the blended mix into 2 loaf pans and bake also*** I hope you enjoy this recipe! Hey there everyone, I hope you all had a wonderful holiday! Today I wanted to share an article I found about some of the most common myths about Asperger's. Asperger's Syndrome, also known as ASD (Autism Spectrum Disorder), AD (Asperger's Disorder), AS (Asperger's Syndrome), or HFA (High Functioning Autism), is characterized by significant difficulties in social interaction and non verbal communication alongside restricted and repetitive patterns of behaviors and interests. A child or adult can fixate on certain subjects they like to learn about or are interested in. Some say that people with Asperger's lack empathy and are anti-social, but that is certainly not always the case. Sometimes it can also be accompanied by the lack of fine and gross motor skills such as difficulty with handwriting, opening a can of soda, or even catching a ball that is thrown in their direction. In 2013 the diagnosis of Asperger's Syndrome was eliminated and replaced with the name Autism Spectrum Disorder. The exact cause of Asperger's is unknown but many speculate that it is genetic. I hope you find the information imformative and helpful. APA Reference Hello there my knitting peeps! I hope you're all enjoying the Dragon Scale Stocking pattern so far! I'd like to just take a sec and thank Meg for noticing 2 small typos in part 1 of the pattern and letting me know. It's been corrected but the mistakes were as follows:
*In row 4 there were a couple of k's that didn't have a number of stiches next to them, they should both be k1 *In row 10, after the last psso there is an extra "k2 yo", it should read "k4 yo k2" Thanks again Meg for bringing these to my attention! :) Now for the last part of the patten, the heel gusset, the foot, and the toe. After you finish turning the heel you end up with 20 stitches, that's where we are going to continue from. HEEL GUSSET: **place stitch markers as needed, I like to PM's to separate my heel sts from the sts I pick up and from my instep just to be safe but it's certainly not required** 1. Knit across the 20 heel flap stitches with the CC (white) 2. With the tip of the ndl and the MC (gold) p/u 15 sts along the side of the heel 3. P/u a st from the row below the first instep st to prevent a hole - you will have a total of 16 picked up sts 4. Slide sts to cable, move instep sts to shaft, work RND 2 of the Dragon Scale pattern across the 37 instep sts with MC (gold) 5. Slide instep sts onto cable 6. With MC (gold) p/u and knit a st from below the last instep st to prevent a hole 7. P/u 15 sts along the side of the heel - you will have a total of 16 picked up sts 8. Knit remaining heel section sts 9. Slide all heel section sts onto cable and the 37 instep sts onto shaft 10. Work RND 3 of Dragon Scale pattern across the instep sts, you will end at the BOR SHAPE THE GUSSET: **All decreases will be done in RND 1 of the next two rnds** Decrease round RND 1: Heel ndl - k1, ssk, work to 3 sts from end, k2tog, k1 Instep ndl - work RND 4 (6)(8)(10)(12) of Dragon Scale pattern Work even this rnd, NO decreases RND 2: Heel ndl - knit even Instep ndl - work RND 5 (7)(9)(11)(13) of Dragon Scale pattern Repeat rnds 1 and 2 until there are 73 sts remaining, 37 sts on instep ndl and 36 sts on heel ndl. Somehow I was short one stitch on the heel ndl, I have no idea where or how but it will be corrected in the next step. If you aren't short a stitch congrats you rock! WORK THE FOOT: If (like me) you are short one stitch on the heel ndl complete the next 2 rnds first then move on, if by chance you're not short then work a set of rnds 2-13 of the Dragon Scale pattern then move on to Shaping The Toe. ***TO INCREASE ONE STITCH*** Heel Ndl: k2, kfb (will now have 4 sts on RH ndl), yo, k2, sl2, k1, p2sso, k2, yo, k1, yo, k5, sl2, k1, p2sso, k5, yo, k1, yo, k2, sl2, k1, p2sso, k2, yo, k4 Instep Ndl: Work RND 2 of Dragon Scale pattern - k4, yo, k2, sl2, k1, p2sso, k2, yo, k1, yo, k5, sl2, k1, p2sso, k5, yo, k1, yo, k2, sl2, k1, p2sso, k2, yo, k4 You have now completed rnd 2 of the set and will continue on from this point by working rnds 3-13 of the Dragon Scale pattern. Then move on to Shaping The Toe. SHAPE THE TOE: With the CC (white) knit 2 rnds even. I do this just to establish my color change but if you feel comfortable skipping this step by all means go ahead. RND 1: Heel ndl: k1, ssk, knit to last 3 sts, k2tog, k1 Instep ndl: k1, ssk, knit to last 3 sts, k2tog, k1 RND 2: Knit even around Repeat rnds 1 & 2 until 46 sts remain, end on a rnd 1. (You will have 23 sts each ndl) Work the decrease rnd only (rnd 1) two times - 38 sts remain (19 sts each ndl) Using Kitchener stitch bind off and weave in ends. Using size 8 (US) dpn's and MC (gold) p/u and knit 4 sts at upper edge of stocking. Continue to work I-cord to desired length, fasten into loop for hanging. Sit back and admire the beautiful work you have created! Please feel free to post pictures of your finished projects in the comments or on the facebook page and show off your fabulous work! I hope you've enjoyed this pattern, I have many more to come! :p https://Facebook.com/ramblingsandrandomnessofanaspergersmom.com For someone with Asperger's forming friendships and lasting bonds can be a very real very overwhelming obstacle. It can make someone feel lonely, isolated, and even lead to depression including children, adolescents, and adults. I know first hand by going through this with my own Aspie how heartbreaking this can be not only for us as parents to have to see, but for our children who are experiencing it. No matter how old they are. As I was scrolling through some articles this morning I happened to come across this one. The woman who wrote it also has Asperger's and writes on to tell us some really useful and helpful ways to make forming friendships and bonds easier. I found a lot of the information to be clear and to the point, which is just the way I like it. :) It's called The Seven Steps To Friendship and I've included the link below. I hope you give it a read and can find something helpful to use in your own everyday lives. :) http://zehlezeh.wordpress.com/2014/12/16/seven-steps-to-friendship/ i hope everyone is enjoying the first part of the Dragon Scale Christmas Stocking that I posted a few days ago. Today I'm going to add the next section after the body of the stocking. This is where we are going to start the heel flap then turn the heel.
Heel Flap with Heel Stitch To set up the heel flap we are going to use the CC (white) and knit across the heel sts (RS). Next purl across the heel sts (WS). I do this just to establish my color change, if you feel comfortable skipping this step by all means go right ahead and just begin with row 1 and row 2 of the heel flap. On ndl one join yarn with (CC) white, you should have 36 sts on this ndl First: Knit across row (RS) Second: Purl across row (WS) Now begin the heel flap rows: (RS) Row 1: *slip 1 st pwise wyib, k1. Repeat from * to end of row (WS) Row 2: slip 1 st pwise, purl to end of row Repeat these 2 rows until until 30 rows are complete, end with a row 2 Now we are going to turn the heel. Turn Heel The row will begin with 36 sts and end with 20 sts. We will still be using the (CC) white. *note* sl1= slip 1 pwise wyib. This pertains to the RS rows. (RS) Row 1: k20, ssk, k1, turn (WS) Row 2: sl1 pwise, p5, p2tog, p1, turn (RS) Row 3: sl1, k6, ssk, k1, turn (WS) Row 4: sl1 pwise, p7, p2tog, p1, turn (RS) Row 5: sl1, k8, ssk, k1, turn (WS) Row 6: sl1 pwise, p9, p2tog, p1, turn (RS) Row 7: sl1, k10, ssk, k1, turn (WS) Row 8: sl1 pwise, p11, p2tog, p1, turn (RS) Row 9: sl1, k12, ssk, k1, turn (WS) Row 10: sl1 pwise, p13, p2tog, p1, turn (RS) Row 11: sl1, k14, ssk, k1, turn (WS) Row 12: sl1 pwise, p15, p2tog, p1, turn (RS) Row 13: sl1, k16, ssk, k1, turn (WS) Row 14: sl1 pwise, p17, p2tog, p1, turn (RS) Row 15: sl1, k18, ssk, turn (WS) Row 16: sl1 pwise, p18, p2tog, turn 20 sts remain That completes the heel flap and the turning of the heel. Please let me know if there are any problems or errors you come across and have fun with this, I'll be posting part 3 very soon. :) Minecraft has literally taken the world by storm and I have to admit that even I like getting on there and playing, building, and crafting.
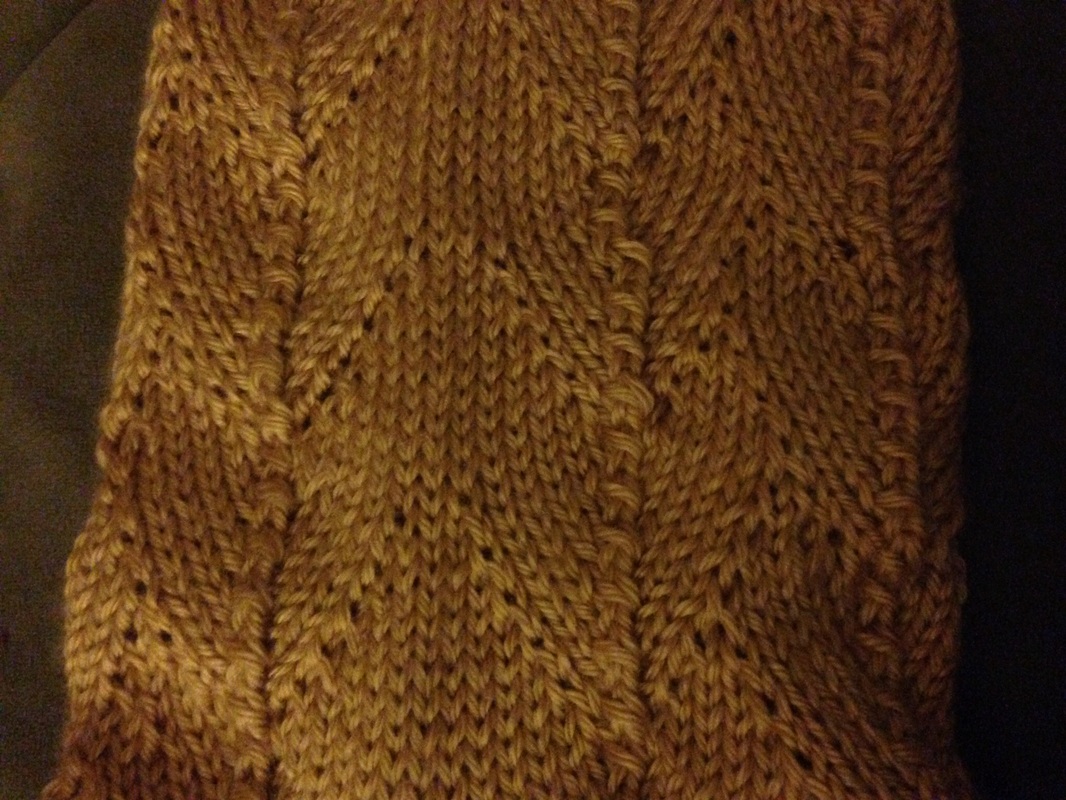
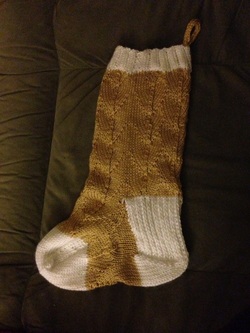
When my son first mentioned the word Minecraft and video game in the same sentence I inwardly cringed and remember thinking "uh oh. Not video games. Not yet." But to my surprise Minecraft was nothing that I ever expected. It was like Legos times 1,000...the building, crafting, creating, and use of imagination out of different colored and element blocks was awesome! I could completely understand why my Aspie loved it so much, the music is very calm and light, the sounds and noises, the entire experience really is very positive and it quickly became a safe place and outlet where my son could retreat to. until of course the bullying begins. The name calling, the destroying of each other's creations and building, the stealing and I could on. We even had an instance where a so called gamer "friend" of his tried to impersonate an administrator and get my son to tell him his login password and private information. So what's a parent to do? I've found just in my own experience that as a parent of an autistic child that great pains need to be taken (more so than the usual) to make ensure the right content, language, graphics, sounds, story, and overall experience are appropriate for them. I was cruising around the Internet the other day and found a great article about a site called Autcraft. It's a site that was created by a father of an autistic child that wanted to create a safe place for his kids to play. What impressed me the most was how devoted him and his volunteers are. Not only is this an Autistic player friendly server but this is a group that devotes it's time and energy to also supporting anyone who needs it, like a support group. As I scrolled through some of the parent testimonials It was one comment after another about how positive and caring everyone was. There as one that spoke about a player that who needed some emotional support after a hard day and they were there for him, never leaving him until they were sure he was ok. Strangers helping children and young adults not only by providing a safe environment but giving them emotional support whenever they need it. Maybe it's just me but I think that's something pretty awesome. I would definately check them out to see what their all about, here's the link to the site: www.autcraft.com If anyone has heard of any other good sites I'd love to know about them! Just leave a comment :) Wow! Man it has really been a while since I have been able to devote some time to you all my friends! If that's not an understatement I don't know what is ;) Well I come bearing gifts (at least for my fellow knitters out there). Today I would like to share a knitting pattern I designed for my son for Christmas. Ever since he was about 3 or 4 years old he has had a deep love of Dragons. And that's saying it mildly. He just loves them, thinks they are super cool, draws them, writes about them, reads about them, you name it. So when I found a pattern out there that was similar to the look of real dragon scales I just had to figure out a way to make it into a hanging Christmas stocking. Out came the old notebook and pencil, and soon I found myself staying up into the wee hours of the night converting a dishcloth pattern that I had found into a Christmas stocking! It really wasn't as hard as I had thought (thankfully) and I am really happy with the results, what makes me even happier is how much my son loved it when I showed it to him. Inspired by my sons love of dragons this piece is knit to look like actual dragon scales using basic sock construction and techniques. This is a fun easy Christmas stocking knit in the round using the magic loop method. It’s engaging enough to keep you interested yet easy enough to memorize and work through quickly. I used less than one skein each of the yarn listed below with plenty to spare. Change the colors out and experiment with different combinations or pick your little dragon lovers favorite colors, get creative. Im going to be posting the pattern in several different parts, this is part one. This design has structural elements from the pattern Lacy Dragon Large Scale Washcloth Here is part one of the Dragon Scale Christmas Stocking pattern.
|

AuthorI'm the busy mom of two pretty awesome boys, one of which has Asperger's. I created this blog to help raise awareness for Autism and Autism Spectrum Disorders. CategoriesArchives
February 2015
|

 RSS Feed
